| 일 | 월 | 화 | 수 | 목 | 금 | 토 |
|---|---|---|---|---|---|---|
| 1 | 2 | |||||
| 3 | 4 | 5 | 6 | 7 | 8 | 9 |
| 10 | 11 | 12 | 13 | 14 | 15 | 16 |
| 17 | 18 | 19 | 20 | 21 | 22 | 23 |
| 24 | 25 | 26 | 27 | 28 | 29 | 30 |
| 31 |
- nohup
- STF
- postgresql
- nGrinder
- Materials
- rethinkdb
- mysql
- Jupyter
- ubuntu
- postgres
- insert
- nmap
- port forwarding
- ftp
- openpyxl
- 28015
- ssh
- 실행권한
- Jupyter Notebook
- STF_PortForwarding
- appium
- centos
- sshpass
- appium server
- perfect
- SWIFT
- kitura
- PYTHON
- create table
- GoCD
- Today
- Total
don't stop believing
Flask로 API 서버 만들기 (7) - Route protection and Authorization 본문
Flask로 API 서버 만들기 (7) - Route protection and Authorization
Tongchun 2018. 11. 18. 19:54Developing API Sample Server by Flask
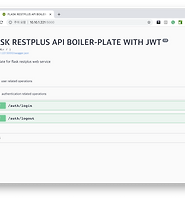
Original Post: How to structure a Flask-RESTPlus web service for production builds
Github: https://github.com/cosmic-byte/flask-restplus-boilerplate
Flask로 API 서버 만들기 (1) - 개발 환경 준비
Flask로 API 서버 만들기 (2) - config 와 실행 확인
Flask로 API 서버 만들기 (3) - User 테이블 만들기
Flask로 API 서버 만들기 (4) - Testing
Flask로 API 서버 만들기 (5) - User Operations
Flask로 API 서버 만들기 (6) - Security and Authentication
Flask API 서버 만들기 마지막 장입니다.
여기까지 User 생성과 Login/out을 했는데요. API서버로 호출할때 authorization token을 사용해 로그인 유저의 호출을 확인하고 API 서버를 보호하는 장치를 만들어 보겠습니다.
여기서는 python의 decorator를 사용하는데 decorator는 나중에 별도로 다루도록 하겠습니다.
auth_helper.py 파일의 auth 클래스에 get_logged_in_user Method를 추가합니다.
$ sudo vim ./app/main/service/auth_helper.py
auth_helper.py 파일에 아래와 같이 추가합니다.
    @staticmethod
    def get_logged_in_user(new_request):
        # get the auth token
        auth_token = new_request.headers.get('Authorization')
        if auth_token:
            resp = User.decode_auth_token(auth_token)
            if not isinstance(resp, str):
                user = User.query.filter_by(id=resp).first()
                response_object = {
                    'status': 'success',
                    'data': {
                        'user_id': user.id,
                        'email': user.email,
                        'admin': user.admin,
                        'registered_on': str(user.registered_on)
                    }
                }
                return response_object, 200
            response_object = {
                'status': 'fail',
                'message': resp
            }
            return response_object, 401
        else:
            response_object = {
                'status': 'fail',
                'message': 'Provide a valid auth token.'
            }
            return response_object, 401
그리고 util 폴더에 decorator.py 파일을 만듭니다.
$ sudo vim ./app/main/util/decorator.py
decorator.py 파일안에 아래와 같이 작성합니다.
from functools import wraps
from flask import request

from app.main.service.auth_helper import Auth


def token_required(f):
    @wraps(f)
    def decorated(*args, **kwargs):

        data, status = Auth.get_logged_in_user(request)
        token = data.get('data')

        if not token:
            return data, status

        return f(*args, **kwargs)

    return decorated


def admin_token_required(f):
    @wraps(f)
    def decorated(*args, **kwargs):

        data, status = Auth.get_logged_in_user(request)
        token = data.get('data')

        if not token:
            return data, status

        admin = token.get('admin')
        if not admin:
            response_object = {
                'status': 'fail',
                'message': 'admin token required'
            }
            return response_object, 401

        return f(*args, **kwargs)

    return decorated
이제 API 들 중 token 인증이 필요하거나 Admin 인증이 필요한 API 에 token_required 또는 admin_token_required decorator를 사용하면 됩니다.
한번 해보겠습니다.
먼저 서버를 실행합니다.
$ python manage.py run
 * Serving Flask app "app.main" (lazy loading)
 * Environment: development
 * Debug mode: on
 * Running on http://0.0.0.0:5000/ (Press CTRL+C to quit)
 * Restarting with stat
 * Debugger is active!
 * Debugger PIN: 145-484-411
curl을 이용해 API를 호출해 보겠습니다.
먼저 전체 유저 리스트를 불러오는 API를 호출 합니다.
터미널 창을 새로 열고 user API를 호출해 보겠습니다.
curl -X GET -H "accept: application/json" "http://10.10.1.221:5000/user/"
$ curl -X GET -H "accept: application/json" "http://10.10.1.221:5000/user/"
{
    "data": [
        {
            "email": "tongchun@ngle.co.kr",
            "username": "tongchun",
            "password": null,
            "public_id": "f195f8f9-cca5-4b83-b958-04b6ad0d9aa9"
        }
    ]
}
emil이 tongchun@ngle.co.kr인 계정이 하나 있습니다.
새로운 user를 생성하는 API도 호출해 봅니다.
curl -X POST -H "Content-Type: application/json" -H "accept: application/json" -d "{ \"email\": \"ngle01@ngle.co.kr\", \"username\": \"ngle.Kim\", \"password\": \"ngle1234\", \"public_id\": \"ngle01\"}" "http://10.10.1.221:5000/user/"
$ curl -X POST -H "accept: application/json" -H "Content-Type: application/json" -d "{ \"email\": \"ngle01@ngle.co.kr\", \"username\": \"ngle.Kim\", \"password\": \"ngle1234\", \"public_id\": \"ngle01\"}" "http://10.10.1.221:5000/user/"
{
  "status": "success",
  "message": "Successfully registered.",
  "Authorization": "eyJ0eXAiOiJKV1QiLCJhbGciOiJIUzI1NiJ9.eyJleHAiOjE1NDI2MjE1MjksImlhdCI6MTU0MjUzNTEyNCwic3ViIjoyfQ.TYmjZqsXaH9WAsTMLdvLwFxtrl0vmjepsojSxH82f_k"
}
새로 만든 ngle01@ngle.co.kr 계정으로 로그인도 해봅니다.
curl -X POST -H "accept: application/json" -H "Content-Type: application/json" -d "{ \"email\": \"ngle01@ngle.co.kr\", \"password\": \"ngle1234\"}" "http://10.10.1.221:5000/auth/login"
$ curl -X POST -H "accept: application/json" -H "Content-Type: application/json" -d "{ \"email\": \"ngle01@ngle.co.kr\", \"password\": \"ngle1234\"}" "http://10.10.1.221:5000/auth/login"
{
    "status": "success",
    "message": "Successfully logged in.",
    "Authorization": "eyJ0eXAiOiJKV1QiLCJhbGciOiJIUzI1NiJ9.eyJleHAiOjE1NDI2MjIyMDQsImlhdCI6MTU0MjUzNTc5OSwic3ViIjoyfQ.vLSiPUtoqlVWgY-xOKT5GR13xfK2ClTyXP9xrVJx_2Y"
}
위 유저 리스트를 불러오는 API와 유저를 새로 추가하는 API는 어떤 권한이 없어도 호출이 가능합니다.
이제 유저 리스트는 로그인 한 유저만이 호출할 수 있고 유저를 새로 추가하는 API는 Admin만 호출이 가능하도록 설정해 보겠습니다.
user_coltroller.py 파일을 열어줍니다.
$ sudo vim ./app/main/controller/user_controller.py
decorator 모듈을 추가하고 UserList 클래스의 get method와 post method에 @token_required를 추가합니다.
from flask import request
from flask_restplus import Resource

from app.main.util.decorator import token_required, admin_token_required
from ..util.dto import UserDto
from ..service.user_service import save_new_user, get_all_users, get_a_user

api = UserDto.api
_user = UserDto.user


@api.route('/')
class UserList(Resource):
    @token_required
    @api.doc('list_of_registered_users')
    @api.marshal_list_with(_user, envelope='data')
    def get(self):
        """List all registered users"""
        return get_all_users()

    @token_required
    @api.response(201, 'User successfully created.')
    @api.doc('create a new user')
    @api.expect(_user, validate=True)
    def post(self):
        """Creates a new User """
        data = request.json
        return save_new_user(data=data)

@api.route('/')
@api.param('public_id', 'The User identifier')
@api.response(404, 'User not found.')
class User(Resource):
    @token_required
    @api.doc('get a user')
    @api.marshal_with(_user)
    def get(self, public_id):
        """get a user given its identifier"""
        user = get_a_user(public_id)
        if not user:
            api.abort(404)
        else:
            return user
이제 대사 API 서버를 실행해 줍니다.
$ python manage.py run
 * Serving Flask app "app.main" (lazy loading)
 * Environment: development
 * Debug mode: on
 * Running on http://0.0.0.0:5000/ (Press CTRL+C to quit)
 * Restarting with stat
 * Debugger is active!
 * Debugger PIN: 145-484-411
위에서 유저 리스트를 불러오는 API를 동일하게 호출해 봅니다.
$ curl -X GET -H "accept: application/json" "http://10.10.1.221:5000/user/"
{
    "status": "fail",
    "message": "Provide a valid auth token."
}
이번에는 auth token이 필요하더고 하네요.
그럼 먼저 로그인을 하고 authorization을 확인합니다.
$ curl -X POST -H "accept: application/json" -H "Content-Type: application/json" -d "{ \"email\": \"ngle01@ngle.co.kr\", \"password\": \"ngle1234\"}" "http://10.10.1.221:5000/auth/login"
{
    "status": "success",
    "message": "Successfully logged in.",
    "Authorization": "eyJ0eXAiOiJKV1QiLCJhbGciOiJIUzI1NiJ9.eyJleHAiOjE1NDI2MjM4OTgsImlhdCI6MTU0MjUzNzQ5Mywic3ViIjoyfQ.XHTWpkvVJMe-au0CCZQp-9dA1MzvORz9TBWWkV2JlP0"
}
로그인 후 받아온 Authorization 코드를 header에 추가해 유저 리스트를 불러 보겠습니다.
$ curl -X GET -H "accept: application/json" -H "Authorization: eyJ0eXAiOiJKV1QiLCJhbGciOiJIUzI1NiJ9.eyJleHAiOjE1NDI2MjM4OTgsImlhdCI6MTU0MjUzNzQ5Mywic3ViIjoyfQ.XHTWpkvVJMe-au0CCZQp-9dA1MzvORz9TBWWkV2JlP0" "http://10.10.1.221:5000/user/"
{
    "data": [
        {
            "email": "tongchun@ngle.co.kr",
            "username": "tongchun",
            "password": null,
            "public_id": "f195f8f9-cca5-4b83-b958-04b6ad0d9aa9"
        },
        {
            "email": "ngle01@ngle.co.kr",
            "username": "ngle.Kim",
            "password": null,
            "public_id": "9a27eb65-c69c-4582-a03f-ec06b673fc1a"
        },
        {
            "email": "ngle02@ngle.co.kr",
            "username": "tongchun.Kim",
            "password": null,
            "public_id": "08a46075-244d-435f-9f89-69da0a459e3a"
        }
    ]
}
잘 호출되는 군요.
여기까지 auth token을 이용한 protection이었습니다.
'Python > Flask' 카테고리의 다른 글
| Flask로 Static Web Server 구성하기 (0) | 2018.11.26 |
|---|---|
| Flask로 API 서버 만들기 (8) - Extra tips (Makefiles) (0) | 2018.11.18 |
| Flask로 API 서버 만들기 (6) - Security and Authentication (0) | 2018.11.12 |
| Flask로 API 서버 만들기 (5) - User Operations (2) | 2018.11.12 |
| Flask로 API 서버 만들기 (4) - Testing (0) | 2018.11.12 |