| 일 | 월 | 화 | 수 | 목 | 금 | 토 |
|---|---|---|---|---|---|---|
| 1 | 2 | 3 | 4 | 5 | 6 | 7 |
| 8 | 9 | 10 | 11 | 12 | 13 | 14 |
| 15 | 16 | 17 | 18 | 19 | 20 | 21 |
| 22 | 23 | 24 | 25 | 26 | 27 | 28 |
- STF_PortForwarding
- ftp
- perfect
- postgresql
- port forwarding
- ubuntu
- openpyxl
- nGrinder
- centos
- kitura
- appium server
- nohup
- Jupyter Notebook
- appium
- 실행권한
- postgres
- ssh
- 28015
- STF
- Materials
- SWIFT
- Jupyter
- insert
- sshpass
- rethinkdb
- GoCD
- mysql
- create table
- nmap
- PYTHON
- Today
- Total
don't stop believing
Flask로 API 서버 만들기 (8) - Extra tips (Makefiles) 본문
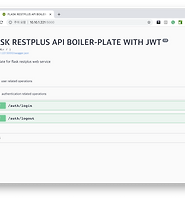
Developing API Sample Server by Flask
Original Post: How to structure a Flask-RESTPlus web service for production builds
Github: https://github.com/cosmic-byte/flask-restplus-boilerplate
Flask로 API 서버 만들기 (1) - 개발 환경 준비
Flask로 API 서버 만들기 (2) - config 와 실행 확인
Flask로 API 서버 만들기 (3) - User 테이블 만들기
Flask로 API 서버 만들기 (4) - Testing
Flask로 API 서버 만들기 (5) - User Operations
Flask로 API 서버 만들기 (6) - Security and Authentication
Extra Tips로 있는 Makefiles까지 해봅시다.
nGleAPI 서버를 배포하고 쉽게 설치하기 위해 Makefile을 만들수 있습니다.
먼저 Makefile을 만듭니다.
$ sudo vim ./Makefile
Makefile 안에 아래와 같이 작성합니다.
.PHONY: clean system-packages python-packages install tests run all

clean:
        find . -type f -name '*.pyc' -delete
        find . -type f -name '*.log' -delete

system-packages:
        sudo apt install python-pip -y

python-packages:
        pip install -r requirements.txt

install: system-packages python-packages

tests:
        python manage.py test

run:
        python manage.py run

all:
        clean install tests run
이제 nGleAPI 서버의 모든 파일을 압축합니다.
$ cd ..
$ tar -czvf nGleAPI_0.1.tar.gz nGleAPI/
정상적으로 tar 압축이 되었다면 nGleAPI_0.1.tar 파일이 생성됩니다.
이걸 다른 서버로 이동하고 압축을 풀어줍니다.
$ tar -xzvf nGleAPI_0.1.tar.gz
$ cd nGleAPI/
압축을 풀고 nGleAPI 폴더를 확인했다면 Makefile을 이용해 API 서버 실행에 필요한 Package들을 설치해 줍니다.
아래 명령으로 설정/설치할 수 있습니다.
- make install : installs both system-packages and python-packages
- make clean : cleans up the app
- make tests : runs the all the tests
- make run : starts the application
- make all : performs clean-up,installation , run tests , and starts the app.
make 명령을 차례대로 수행하거나 make all 로 한번에 설치하고 test 후 실행까지 할 수 있습니다.
$ make run
python3 manage.py run
 * Serving Flask app "app.main" (lazy loading)
 * Environment: development
 * Debug mode: on
 * Running on http://0.0.0.0:5000/ (Press CTRL+C to quit)
 * Restarting with stat
 * Debugger is active!
 * Debugger PIN: 145-484-411
만약 make 명령을 했을 때 아래와 같이 python 명령을 찾을 수 없다면 Makefile에 python3로 명시해 주면 해결될 수 있습니다.
make: python: Command not found
.PHONY: clean system-packages python-packages install tests run all

clean:
        find . -type f -name '*.pyc' -delete
        find . -type f -name '*.log' -delete

system-packages:
        sudo apt install python3-pip -y

python-packages:
        pip3 install -r requirements.txt

install: system-packages python-packages

tests:
        python3 manage.py test

run:
        python3 manage.py run

all:
        clean install tests run
여기까지 입니다.
'Python > Flask' 카테고리의 다른 글
| Flask로 Static Web Server 구성하기 (0) | 2018.11.26 |
|---|---|
| Flask로 API 서버 만들기 (7) - Route protection and Authorization (1) | 2018.11.18 |
| Flask로 API 서버 만들기 (6) - Security and Authentication (0) | 2018.11.12 |
| Flask로 API 서버 만들기 (5) - User Operations (2) | 2018.11.12 |
| Flask로 API 서버 만들기 (4) - Testing (0) | 2018.11.12 |